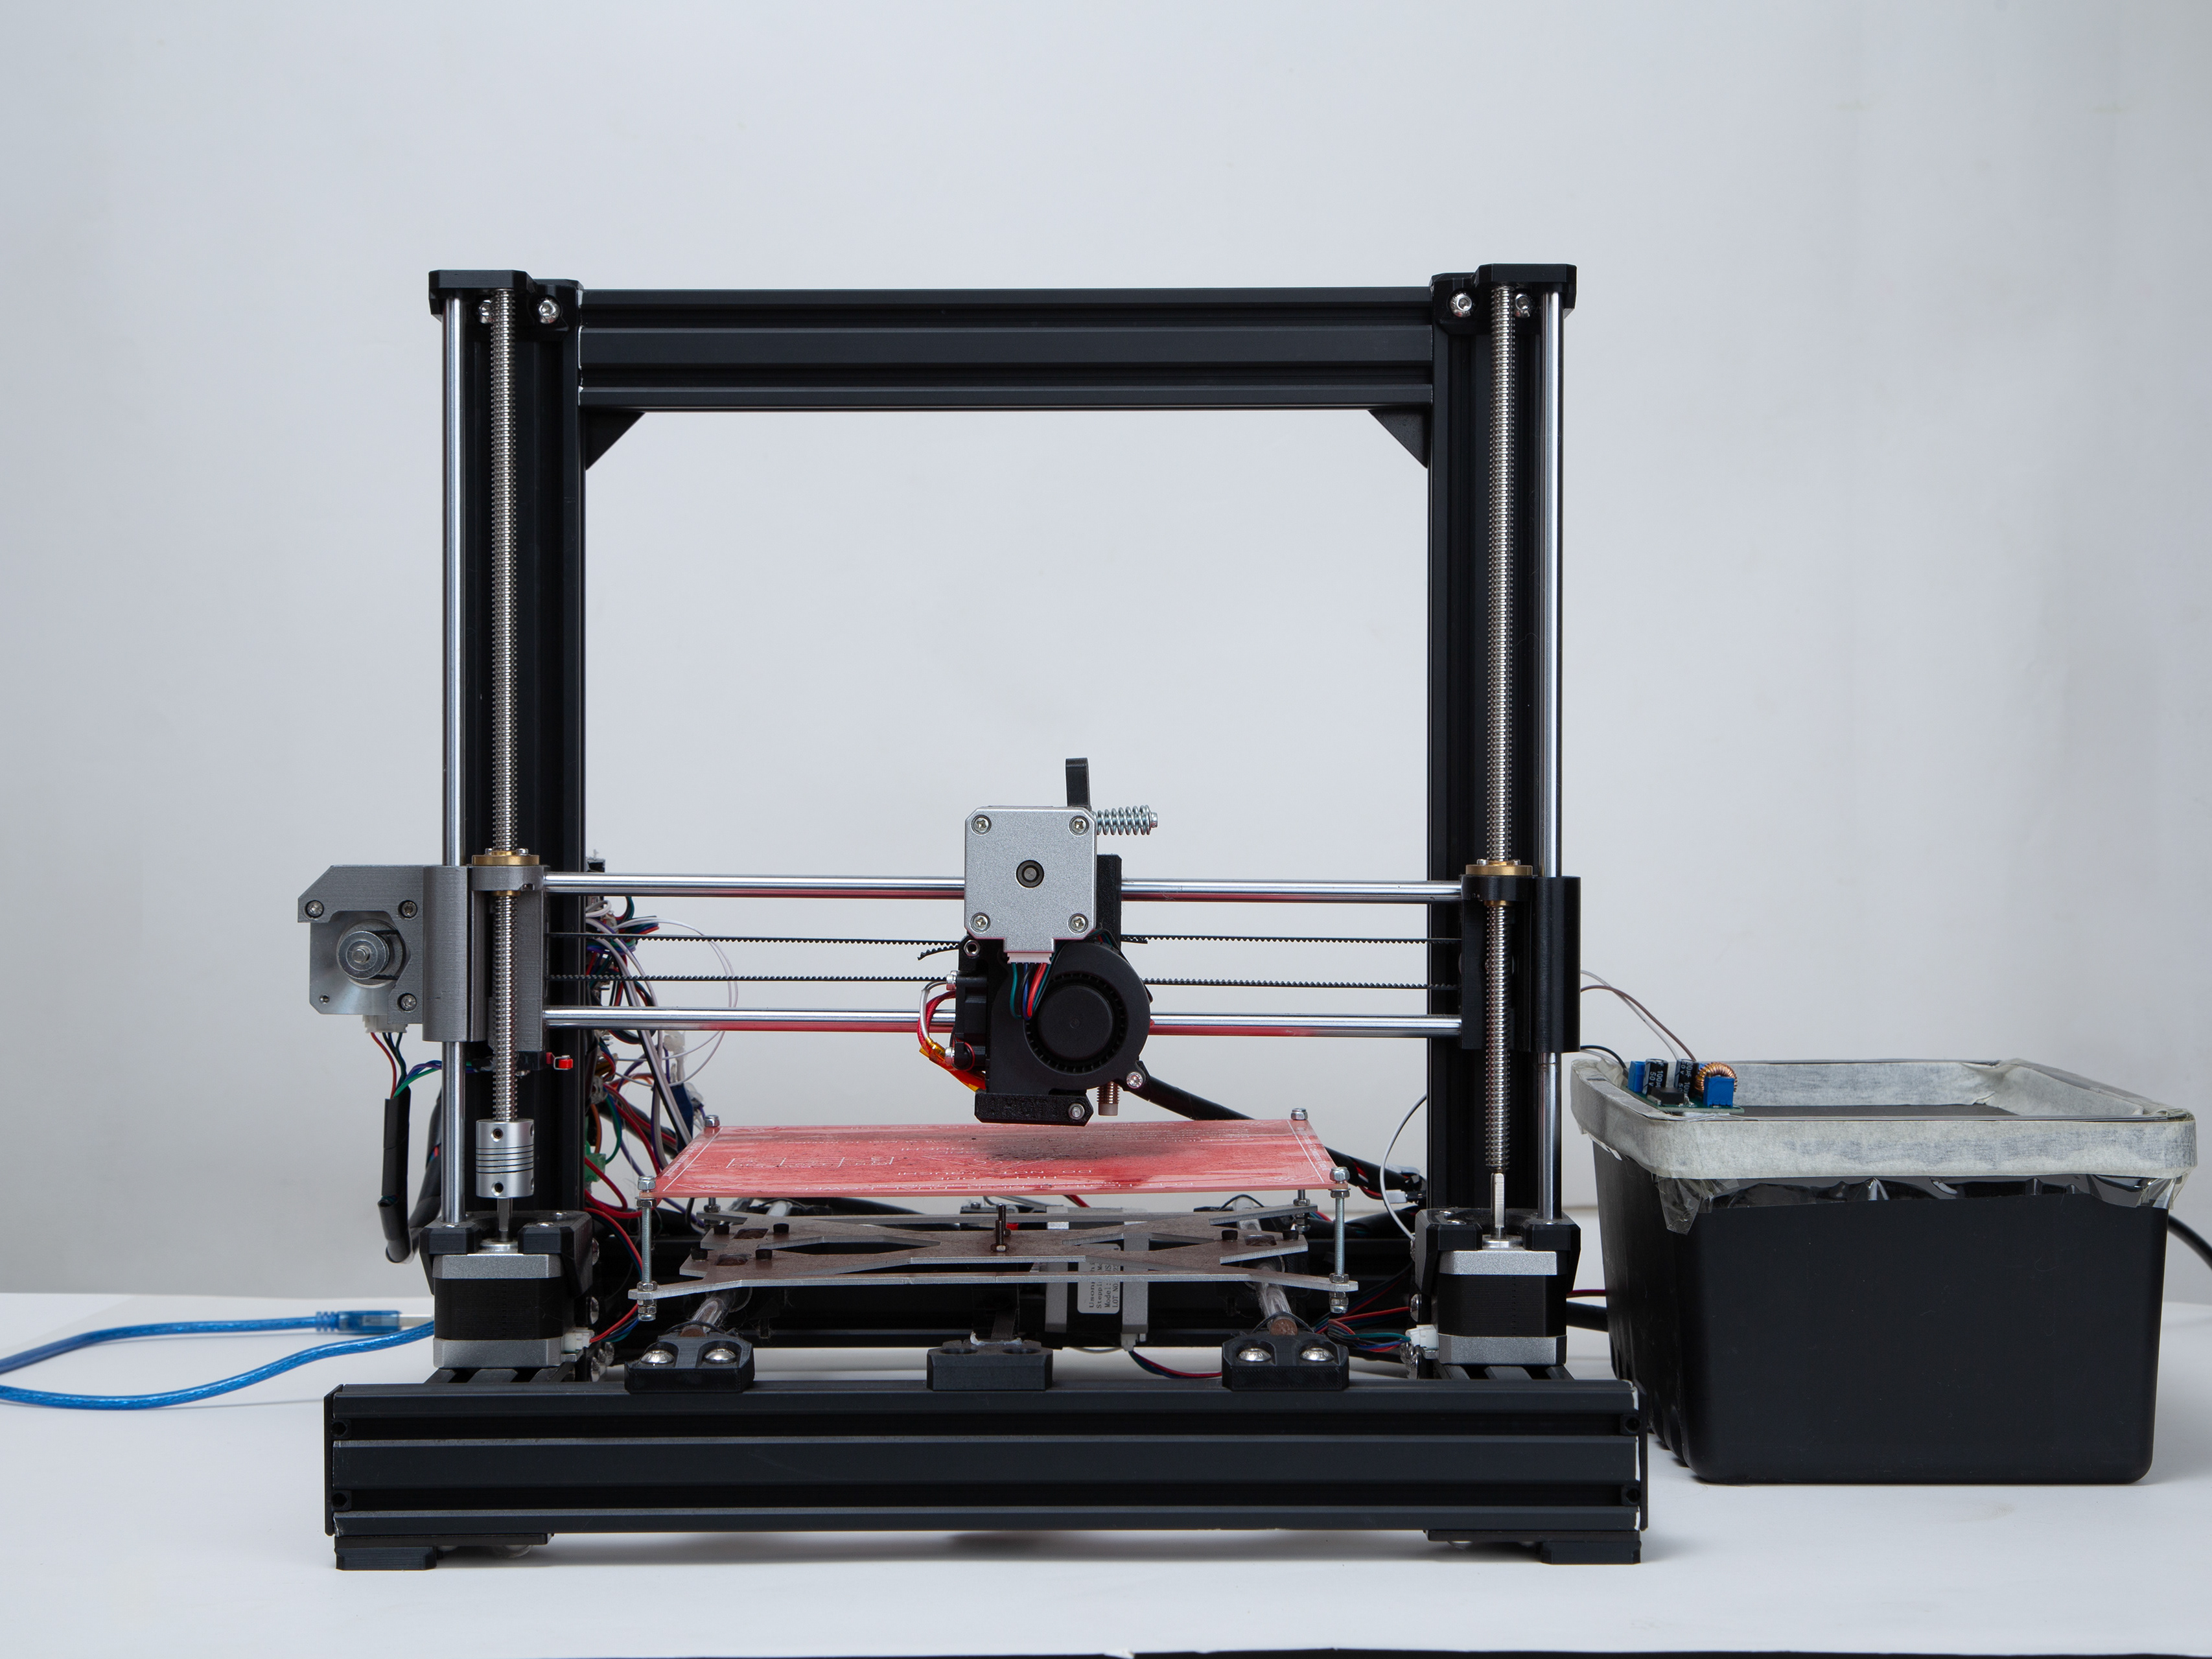
I designed and engineered an exceptionally compact FDM (Fused Deposition Modeling) 3D printer using recycled and upcycled E-waste. The project involved creating specialized motion systems, designing structures optimized for a minimal build volume, and developing accompanying software. Through this process, I gained proficiency in CAD modeling, 3D printing techniques, Arduino-based programming, and insights into product design for manufacturing and sustainable material use.
Recycled Materials and Structural Elements
Initially, I used motors and threaded rods salvaged from old CD-ROM drives to achieve a compact and functional motion system. As I scale up production, I plan to 3D-print the entire printer structure and its carriages from recycled PET plastic. This approach reduces reliance on virgin materials and ensures that the final product maintains sufficient rigidity and precision despite its miniature size.
Rods, Threaded Components, and Compact Integration
I employed M3 stainless steel smooth rods and an M3 threaded rod featuring 1 mm spaced grooves to drive linear motion. The roughly 4.5 cm long threaded rod ensures minimal Z-axis travel, keeping the system tight and efficient. The chosen rods and lead screws matched the scale of the repurposed motor, achieving a cohesive, space-saving design.
Heat Management Solutions
No additional insulation or specialized cooling measures were introduced around the hotend. Given the slow, precise nature of small-volume printing, the basic setup was sufficient. Future iterations may explore more advanced thermal management strategies if print speeds or material choices change.
Ensuring Proper Alignment and Leveling
To confirm alignment and squareness, I used a mobile incline-measuring application. Placing a smartphone on structural surfaces allowed me to verify that each axis was level and parallel without investing in expensive metrology equipment. Careful manual adjustments ensured accurate motion in all directions.
End-stop Switches and Firmware Configuration
Mechanical end-stop switches provided a simple and cost-effective homing solution. Positioned such that the carriage reliably triggered the switch at the home position, these end-stops were integrated into an Arduino RAMPS setup. With minor firmware modifications (in Marlin), the microcontroller accurately interpreted end-stop signals, ensuring the axes never exceeded their intended travel limits.
Extruder Configuration and Motor Weight Considerations
A Bowden extruder system was chosen to address weight constraints. The motor salvaged from the CD-ROM drive was too large and heavy to mount directly on the carriage. I reduced moving mass by placing it off-axis and channeling filament through a PTFE tube to the hotend, improving print speed and stability within the printer’s minimal space.
Print Bed Stability and Calibration
Print Bed Stability and Calibration
To maintain a stable print platform, I combined a metal print bed, compression springs, and adjustable screws. Despite the small footprint, this setup allowed for the fine-tuning of the bed level. The reduced bed area minimized risks of flex or sag. With careful assembly and incremental adjustments, the bed remained rigid and consistently level throughout calibration tests.
Selecting Arduino RAMPS and a 12V 5A Power Supply
I selected an Arduino RAMPS board for control due to its affordability, compatibility with familiar stepper drivers, and extensive firmware support. Although other boards offered more features, they would have increased complexity and cost, which would have countered the project’s goals. The chosen 12V 5A power adapter matched the printer’s low power demands without introducing unnecessary expense or complications.
Moving from Prototype to Commercial Kit
Standardizing components and documentation becomes crucial as I consider commercializing the PicoPrinter through an eCommerce platform. The final version will use recycled PET plastics for all structural elements, ensuring consistent quality and sustainability. I will develop a step-by-step assembly and calibration manual, refine the supply chain for reclaimed materials, and implement quality checks. These measures will help maintain consistent print quality and reliability, enabling customers to own a fully functional, eco-friendly 3D printer at an accessible price.
Carriage Design and Smooth Rails
Designing the carriage, which moves via a threaded rod turned by a recycled motor, required precise grooves for proper engagement. Initially slow and tedious, I realized that grooves on one side were sufficient if the carriage pressed firmly against the rod. Integrating smooth rods provided linear guidance, improving motion and preventing binding. Even minor hole misplacements impacted carriage travel, underscoring the importance of precision and tight tolerances in such a miniature system.
End-stop Switches and Axis-specific Bases
Incorporating end-stop switches allowed the firmware to detect initial states reliably. Placing switches on the side opposite the motor saved space and shortened the axes. Creating axis-specific bases proved challenging, as I thickened the Y-axis for rigidity, widened the X-axis side for mounting, and optimized the Z-axis by removing unnecessary material. These modifications highlighted the complexity of sustaining structural integrity in a small, sustainable design.
Axis-specific Carriages and Thermal Considerations
Customizing each axis carriage ensured the proper placement of bearings, hotend clamps, and mounting holes. Therm effects from the hotend might deform printed parts, potentially necessitating a CNC-machined Z-axis for future iterations. Aligning holes for nuts and considering heat-induced deformation introduced another layer of complexity, reinforcing the need for continuous learning and material experimentation.
Alignment, Structure, and Metal Frame Integration
Aligning all axes and verifying correctness both in CAD and reality proved exhausting. Adjustments and metal reinforcements were required to ensure the printer wouldn’t move due to axis motion. Laser-cut metal walls provided robust attachment points, increased mass, and improved stability. Mild steel offered a cost-effective way to anchor the printer and prevent displacement.
Power Supply, Control Board, and Interference Management
Mounting the Arduino RAMPS board and 12V 5A power supply behind the X-axis wall conserved space. Testing various power supplies revealed that placing them too close to the Arduino caused electromagnetic interference. Understanding and mitigating interference became essential to ensuring stable operations in such a compact layout.
Calibration and Testing
The final calibration involved leveling the hotend and bed, adjusting the bed height to about 12 mm above the Y-axis carriage, and printing test cubes to verify accuracy. Iterative tuning improved print quality. Watching a machine built from recycled materials produce functional prints validated the project’s sustainable approach. This success fueled plans to develop kits for sale, along with a system to convert plastic bottles into PET filament—further elevating the project’s environmental contribution.
From using CD-ROM parts for motion components to planning a future reliance on recycled PET, the printer’s evolution demonstrates that sustainable materials and thoughtful design can produce reliable, functional products. Each phase—from axis alignment to firmware configuration, heat considerations to calibration—presented challenges that demanded new skills, persistence, and adaptability.
Ultimately, the PicoPrinter proves that resourceful design and careful planning can overcome size, cost, and complexity constraints. Looking ahead, selling the printer as a kit through a dedicated eCommerce website represents a significant step toward sharing these sustainable engineering principles with a global audience. In doing so, the project meets technical and educational objectives and contributes meaningfully to a more sustainable future for hardware development.

